
Boundaries of Yin and Yang: Difference between revisions
From Digital Masters World
More actions
Revision as of 18:53, 12 January 2026 by imported>SJ XIII (→Raids)
El3mentary (talk | contribs) No edit summary |
imported>SJ XIII |
||
| (2 intermediate revisions by 2 users not shown) | |||
| Line 1: | Line 1: | ||
<div class="mh"><imagemap> | |||
File:Boundaries of Yin and Yang.png|right|350px | |||
</imagemap></div> | |||
<div class="mh"><imagemap> | |||
File:Boundaries of Yin and Yang1.png|right|350px | |||
</imagemap></div> | |||
'''The area where Fanglongmon and the Four Holy Beasts exists.''' | '''The area where Fanglongmon and the Four Holy Beasts exists.''' | ||
*[[File:Pass (Fanglongmon Dungeon).png]] '''Pass [Fanglongmon Dungeon]''' is required to enter the Dungeon. | |||
*[[File:Pass Fanglongmon Dungeon.png | *Talk to NPC Guilmon in [[D-Terminal]] to receive Quest (Daily) that obtain 2 [[File:Pass (Fanglongmon Dungeon).png|link=]] '''Pass [Fanglongmon Dungeon]'''. | ||
*Talk to NPC Guilmon in [[D-Terminal]] to receive Quest (Daily) that obtain 2 [[File:Pass Fanglongmon Dungeon.png|link=]] '''Pass [Fanglongmon Dungeon]'''. | *Talk to NPC Renamon in [[D-Terminal]] by trading 100x [[File:Yin and Yang Spirit.png|link=]] '''Yin and Yang Spirit''' for 1 [[File:Pass (Fanglongmon Dungeon).png|link=]] '''Pass [Fanglongmon Dungeon]'''. | ||
*Talk to NPC Renamon in [[D-Terminal]] by trading 100x [[File:Yin and Yang Spirit.png|link=]] '''Yin and Yang Spirit''' for 1 [[File:Pass Fanglongmon Dungeon.png|link=]] '''Pass [Fanglongmon Dungeon]'''. | *[[File:Yin and Yang Spirit.png|link=]] Yin and Yang Spirit can be dropped from any Digimon in [[Versandi Terminal]] | ||
*[[File:Yin and Yang Spirit.png|link=]]Yin and Yang Spirit can be dropped from any Digimon in [[Versandi Terminal]] | |||
==Info== | |||
*Upon entering the dungeon, the room is separated by 4 different zones, which similar to [[Descending Thunder God]] Dungeon. | *Upon entering the dungeon, the room is separated by 4 different zones, which similar to [[Descending Thunder God]] Dungeon. | ||
*There will be 4 raids in this room:[[Xuanwumon (The Ruler of the North)|Xuanwumon]] [[Zhuqiaomon (The Ruler of the South)|Zhuqiaomon]] [[Baihumon (The Ruler of the West)|Baihumon]] and [[Qinglongmon (The Ruler of the East)|Qinglongmon]] | *There will be 4 raids in this room:[[Xuanwumon (The Ruler of the North)|Xuanwumon]] [[Zhuqiaomon (The Ruler of the South)|Zhuqiaomon]] [[Baihumon (The Ruler of the West)|Baihumon]] and [[Qinglongmon (The Ruler of the East)|Qinglongmon]] | ||
| Line 28: | Line 24: | ||
*Final boss on this room will be [[Qinglongmon (The Ruler of the East)|Qinglongmon]]. | *Final boss on this room will be [[Qinglongmon (The Ruler of the East)|Qinglongmon]]. | ||
*Defeat [[Qinglongmon (The Ruler of the East)|Qinglongmon]] and proceed to the second room. | *Defeat [[Qinglongmon (The Ruler of the East)|Qinglongmon]] and proceed to the second room. | ||
*Once enter the second room, Player is unable to return to the previous room. | |||
*Party member that disconnect can't enter the second room directly, the raid from the first room will respawn and need to defeat again to enter the second room again. Thus best to avoid disconnection in second room. | |||
=Fanglongmon Dungeon= | |||
== | |||
==Raids== | ==Raids== | ||
[[File: | [[File:Xuanwumon (Mega) Icon.png|link=Xuanwumon (The Ruler of the North)]] | ||
[[Xuanwumon (The Ruler of the North)]] | [[Xuanwumon (The Ruler of the North)]] | ||
| Line 98: | Line 44: | ||
[[Qinglongmon (The Ruler of the East)]] | [[Qinglongmon (The Ruler of the East)]] | ||
==Rewards== | |||
Obtain the following item when Xuanwumon (The Ruler of the North) is defeated. | |||
<div class="fhbbox mw-collapsible mw-collapsed"> | |||
'''[[File:Yin and Yang Box icon.png]] Yin and Yang Box (Xuanwumon)''' | |||
<div class="mw-collapsible-content"> | |||
{| | |||
|10x||[[File:DigiSoul Food HP A.png]] ||DigiSoul Food HP: B | |||
|- | |||
|10x||[[File:DigiSoul Food DS A.png]] ||DigiSoul Food DS: B | |||
|- | |||
|10x||[[File:DigiSoul Food ALL A.png]] ||DigiSoul Food ALL: B | |||
|- | |||
|?x||[[File:Grace of Challenge AT +50%.png]] ||Grace of Challenge [AT] +50% | |||
|- | |||
|?x||[[File:Grace of Challenge HP Max +50%.png]] ||Grace of Challenge [HP Max] +50% | |||
|- | |||
|?x||[[File:Grace of Challenge DS Max +50%.png]] ||Grace of Challenge [DS Max] +50% | |||
|- | |||
|?x||[[File:Grace of Challenge DE +50%.png]] ||Grace of Challenge [DE] +50% | |||
|- | |||
|?x||[[File:Grace of Challenge EXP +1000%.png]] ||Grace of Challenge [EXP] +1000% | |||
|- | |||
|?x||[[File:Grace of Challenge Skill Damage +100%.png]] ||Grace of Challenge [Skill Damage] +100% | |||
|- | |||
|?x||[[File:Grace of Challenge Critical Damage +100%.png]] ||Grace of Challenge [Critical Damage] +100% | |||
|- | |||
|?x||[[File:Grace of Challenge MS +35%.png]] ||Grace of Challenge [MS] +35% | |||
|- | |||
|1x||[[File:Chipset G.png]] ||Chipset Box [HP] R10 | |||
|- | |||
|1x||[[File:Chipset G.png]] ||Chipset Box [AT] R10 | |||
|- | |||
|1x||[[File:Xuanwumon Sealed Shiny Ring.png]] ||Xuanwumon Sealed Shiny Ring | |||
|- | |||
|1x||[[File:Xuanwumon's Aquatic Ornament.png]] ||Xuanwumon's Aquatic Ornament (30 Days) | |||
|- | |||
|1x||[[File:Xuanwumon's Aquatic Cape.png]] ||Xuanwumon's Aquatic Cape (30 Days) | |||
|- | |||
|1x||[[File:Xuanwumon's Aquatic Short Pants.png]] ||Xuanwumon's Aquatic Short Pants (30 Days) | |||
|- | |||
|1x||[[File:Xuanwumon's Aquatic Hooded Shirt.png]] ||Xuanwumon's Aquatic Hooded Shirt (30 Days) | |||
|- | |||
|1x||[[File:Xuanwumon's Aquatic Gloves.png]] ||Xuanwumon's Aquatic Gloves (30 Days) | |||
|- | |||
|300x||[[File:Seal Icon.png]] ||Xuanwumon Seal | |||
|- | |||
|} | |||
</div> | |||
Obtain the following item when Zhuqiaomon (The Ruler of the South) is defeated. | |||
<div class="fhbbox mw-collapsible mw-collapsed"> | |||
'''[[File:Yin and Yang Box icon.png]] Yin and Yang Box (Zhuqiaomon)''' | |||
<div class="mw-collapsible-content"> | |||
{| | |||
|10x||[[File:DigiSoul Food HP A.png]] ||DigiSoul Food HP: B | |||
|- | |||
|10x||[[File:DigiSoul Food DS A.png]] ||DigiSoul Food DS: B | |||
|- | |||
|10x||[[File:DigiSoul Food ALL A.png]] ||DigiSoul Food ALL: B | |||
|- | |||
|?x||[[File:Grace of Challenge AT +50%.png]] ||Grace of Challenge [AT] +50% | |||
|- | |||
|?x||[[File:Grace of Challenge HP Max +50%.png]] ||Grace of Challenge [HP Max] +50% | |||
|- | |||
|?x||[[File:Grace of Challenge DS Max +50%.png]] ||Grace of Challenge [DS Max] +50% | |||
|- | |||
|?x||[[File:Grace of Challenge DE +50%.png]] ||Grace of Challenge [DE] +50% | |||
|- | |||
|?x||[[File:Grace of Challenge EXP +1000%.png]] ||Grace of Challenge [EXP] +1000% | |||
|- | |||
|?x||[[File:Grace of Challenge Skill Damage +100%.png]] ||Grace of Challenge [Skill Damage] +100% | |||
|- | |||
|?x||[[File:Grace of Challenge Critical Damage +100%.png]] ||Grace of Challenge [Critical Damage] +100% | |||
|- | |||
|?x||[[File:Grace of Challenge MS +35%.png]] ||Grace of Challenge [MS] +35% | |||
|- | |||
|1x||[[File:Chipset G.png]] ||Chipset Box [DS] R10 | |||
|- | |||
|1x||[[File:Chipset G.png]] ||Chipset Box [HT] R10 | |||
|- | |||
|1x||[[File:Flame Necklace of Sealed Zhuqiamon.png]] ||Flame Earring of Sealed Zhuqiaomon | |||
|- | |||
|1x||[[File:Zhuqiaomon's Infernal Ornament.png]] ||Zhuqiaomon's Infernal Ornament | |||
|- | |||
|1x||[[File:Zhuqiaomon's Infernal Cape.png]] ||Zhuqiaomon's Infernal Cape | |||
|- | |||
|1x||[[File:Zhuqiamon's Infernal Gloves.png]] ||Zhuqiaomon's Infernal Gloves | |||
|- | |||
|1x||[[File:Zhuqiamon's Infernal Hooded Shirt.png]] ||Zhuqiaomon's Infernal Hooded Shirt | |||
|- | |||
|1x||[[File:Zhuqiamon's Infernal Short Pants.png]] ||Zhuqiaomon's Infernal Short Pants | |||
|- | |||
|300x||[[File:Seal Icon.png]] ||Zhuqiaomon Seal | |||
|- | |||
|} | |||
</div> | |||
== | Obtain the following item when Baihumon (The Ruler of the West) is defeated. | ||
<div class="fhbbox mw-collapsible mw-collapsed"> | |||
'''[[File:Yin and Yang Box icon.png]] Yin and Yang Box (Baihumon)''' | |||
<div class="mw-collapsible-content"> | |||
{| | |||
|15x||[[File:DigiSoul Food HP A.png]] DigiSoul Food HP: B | |||
|- | |||
|15x||[[File:DigiSoul Food DS A.png]] DigiSoul Food DS: B | |||
|- | |||
|15x||[[File:DigiSoul Food ALL A.png]] DigiSoul Food ALL: B | |||
|- | |||
|?x||[[File:Grace of Challenge AT +50%.png]] Grace of Challenge [AT] +50% | |||
|- | |||
|?x||[[File:Grace of Challenge HP Max +50%.png]] Grace of Challenge [HP Max] +50% | |||
|- | |||
|?x||[[File:Grace of Challenge DS Max +50%.png]] Grace of Challenge [DS Max] +50% | |||
|- | |||
|?x||[[File:Grace of Challenge DE +50%.png]] Grace of Challenge [DE] +50% | |||
|- | |||
|?x||[[File:Grace of Challenge EXP +1000%.png]] Grace of Challenge [EXP] +1000% | |||
|- | |||
|?x||[[File:Grace of Challenge Skill Damage +100%.png]] Grace of Challenge [Skill Damage] +100% | |||
|- | |||
|?x||[[File:Grace of Challenge Critical Damage +100%.png]] Grace of Challenge [Critical Damage] +100% | |||
|- | |||
|?x||[[File:Grace of Challenge MS +35%.png]] Grace of Challenge [MS] +35% | |||
|- | |||
|1x||[[File:Chipset G.png]] Chipset Box [AT] R10 | |||
|- | |||
|1x||[[File:Chipset G.png]] Chipset Box [EV] R10 | |||
|- | |||
|1x||[[File:Aural Earring of Sealed Baihumon.png]] Aural Earring of Sealed Baihumon | |||
|- | |||
|1x||[[File:Baihumon's Flawless Ornament.png]] Baihumon's Flawless Ornament | |||
|- | |||
|1x||[[File:Baihumon's Flawless Cape.png]] Baihumon's Flawless Cape | |||
|- | |||
|1x||[[File:Baihumon's Flawless Hooded Shirt.png]] Baihumon's Flawless Hooded Shirt | |||
|- | |||
|1x||[[File:Baihumon's Flawless Short Pants.png]] Baihumon's Flawless Short Pants | |||
|- | |||
|1x||[[File:Baihumon's Flawless Gloves.png]] Baihumon's Flawless Gloves | |||
|- | |||
|300x||[[File:Seal Icon.png]] Baihumon Seal | |||
|- | |||
|} | |||
</div> | |||
<div class=" | Obtain the following item when Qinglongmon (The Ruler of the East) is defeated. | ||
File: | <div class="fhbbox mw-collapsible mw-collapsed"> | ||
'''[[File:Yin and Yang Box icon.png]] Yin and Yang Box (Qinglongmon)''' | |||
<div class="mw-collapsible-content"> | |||
{| | |||
|15x||[[File:DigiSoul Food HP A.png]] DigiSoul Food HP: B | |||
|- | |||
|15x||[[File:DigiSoul Food DS A.png]] DigiSoul Food DS: B | |||
|- | |||
|15x||[[File:DigiSoul Food ALL A.png]] DigiSoul Food ALL: B | |||
|- | |||
|?x||[[File:Grace of Challenge AT +50%.png]] Grace of Challenge [AT] +50% | |||
|- | |||
|?x||[[File:Grace of Challenge HP Max +50%.png]] Grace of Challenge [HP Max] +50% | |||
|- | |||
|?x||[[File:Grace of Challenge DS Max +50%.png]] Grace of Challenge [DS Max] +50% | |||
|- | |||
|?x||[[File:Grace of Challenge DE +50%.png]] Grace of Challenge [DE] +50% | |||
|- | |||
|?x||[[File:Grace of Challenge EXP +1000%.png]] Grace of Challenge [EXP] +1000% | |||
|- | |||
|?x||[[File:Grace of Challenge Skill Damage +100%.png]] Grace of Challenge [Skill Damage] +100% | |||
|- | |||
|?x||[[File:Grace of Challenge Critical Damage +100%.png]] Grace of Challenge [Critical Damage] +100% | |||
|- | |||
|?x||[[File:Grace of Challenge MS +35%.png]] Grace of Challenge [MS] +35% | |||
|- | |||
|1x||[[File:Chipset G.png]] Chipset Box [DE] R10 | |||
|- | |||
|1x||[[File:Chipset G.png]] Chipset Box [CT] R10 | |||
|- | |||
|1x||[[File:Qinglongmon's Sealed Radiant Ring.png]] Qinglongmon's Sealed Radiant Ring | |||
|- | |||
|1x||[[File:Qinglongmon's Sealed Radiant Necklace.png]] Qinglongmon's Sealed Radiant Necklace | |||
|- | |||
|1x||[[File:Qinglongmon's Sealed Radiant Earring.png]] Qinglongmon's Sealed Radiant Earring | |||
|- | |||
|1x||[[File:Qinglongmon's Thunder Hair Accessory.png]] Qinglongmon's Lightning Ornament | |||
|- | |||
|1x||[[File:Qinglongmon's Thunder Short Pants.png]] Qinglongmon's Lightning Short Pants | |||
|- | |||
|1x||[[File:Qinglongmon's Thunder Gloves.png]] Qinglongmon's Lightning Gloves | |||
|- | |||
|1x|||[[File:Qinglongmon's Thunder Hood T-shirts.png]] Qinglongmon's Thunder Hood T-shirts | |||
|- | |||
|1x|||[[File:Qinglongmon's Thunder Cape.png]] Qinglongmon's Thunder Cape | |||
|- | |||
|300x||[[File:Seal Icon.png]] Qinglongmon Seal | |||
|- | |||
|} | |||
</div> | |||
=Fanglongmon Dungeon Underground= | |||
==Raids== | ==Raids== | ||
| Line 126: | Line 247: | ||
[[File:Fanglongmon Icon.png|link=Fanglongmon (Raid)]] | [[File:Fanglongmon Icon.png|link=Fanglongmon (Raid)]] | ||
[[Fanglongmon (Raid)]] | [[Fanglongmon (Raid)]] | ||
==Rewards== | |||
Obtain the following item when Fanglongmon is defeated. | |||
{| | |||
|1x||[[File:Fanronkou .png]]|| Fanronkou | |||
|- | |||
|1x||[[File:Divine Crystal.png]]|| Divine Crystal |||(not guaranteed drop) | |||
|- | |||
|1x||[[File:Yin and Yang Box icon.png]]|| Yin and Yang Box (Fanglongmon) | |||
|- | |||
|} | |||
<div class="fhbbox mw-collapsible mw-collapsed"> | |||
'''[[File:Yin and Yang Box icon.png]] Yin and Yang Box (Fanglongmon)'''''' | |||
<div class="mw-collapsible-content"> | |||
{| | |||
|100x||[[File:Currency Digicore.png]]||Digicore | |||
|- | |||
|15x||[[File:Jump Booster.png]]||Jump Booster [All Area] | |||
|- | |||
|5x||[[File:Amazing Renewal Increase Stone.png]]||Amazing Renewal Increase Stone | |||
|- | |||
|5x||[[File:Amazing Digitary Power Stone.png]]||Amazing Digitary Power Stone | |||
|- | |||
|20x|| [[File:Fanglongmon's Life.png]]||Fanglongmon's Life | |||
|- | |||
|20x|| [[File:Fanglongmon's Digisoul.png]]||Fanglongmon's Digisoul | |||
|- | |||
|3x|| [[File:Fanglongmon's Energy.png]]||Fanglongmon's Energy | |||
|- | |||
|3x|| [[File:Mercy of the Gold Dragon AT.png]]||Mercy of the Gold Dragon [AT] +50% | |||
|- | |||
|3x|| [[File:Mercy of the Gold Dragon HP.png]]||Mercy of the Gold Dragon [Max HP] +50% | |||
|- | |||
|3x|| [[File:Mercy of the Gold Dragon DS.png]]||Mercy of the Gold Dragon [Max DS] +50% | |||
|- | |||
|3x|| [[File:Mercy of the Gold Dragon DE.png]]||Mercy of the Gold Dragon [DE] +50% | |||
|- | |||
|3x|| [[File:Mercy of the Gold Dragon EXP.png]]||Mercy of the Gold Dragon [EXP] +1000% | |||
|- | |||
|3x|| [[File:Rage of the Gold Dragon SK.png]]||Rage of the Gold Dragon [Skill Damage] +100% | |||
|- | |||
|3x|| [[File:Rage of the Gold Dragon CD.png]]||Rage of the Gold Dragon [Critical Damage] +100% | |||
|- | |||
|3x|| [[File:Rage of the Gold Dragon MS.png]]||Rage of the Gold Dragon [Movement Speed] +35% | |||
|- | |||
|1x|| [[File:Chipset Box.png]]||Chipset Box [HP] R11 | |||
|- | |||
|1x|| [[File:Chipset Box.png]]||Chipset Box [DS] R11 | |||
|- | |||
|1x|| [[File:Chipset Box.png]]||Chipset Box [AT] R11 | |||
|- | |||
|1x|| [[File:Chipset Box.png]]||Chipset Box [DE] R11 | |||
|- | |||
|1x|| [[File:Chipset Box.png]]||Chipset Box [HT] R11 | |||
|- | |||
|1x|| [[File:Chipset Box.png]]||Chipset Box [EV] R11 | |||
|- | |||
|1x|| [[File:Chipset Box.png]]||Chipset Box [CT] R11 | |||
|- | |||
|1x|| [[File:Fanglongmon's_Ring_Lv1.png]]||Fanglongmon's Ancient Ring [Lv.1] | |||
|- | |||
|1x|| [[File:Fanglongmon's_Necklace_Lv1.png]]||Fanglongmon's Ancient Necklace [Lv.1] | |||
|- | |||
|1x|| [[File:Fanglongmon's_Earring_Lv1.png]]||Fanglongmon's Ancient Earring [Lv.1] | |||
|- | |||
|1x|| [[File:Advanced 102-Blue-BT Random Box.png]]||Advanced 102-Blue-BT Random Box | |||
|- | |||
|1x|| [[File:Fanronkou .png]]||Fanronkou | |||
|- | |||
|} | |||
</div> | |||
Latest revision as of 18:53, 12 January 2026
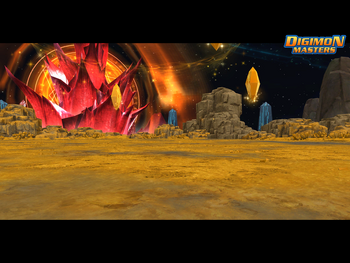
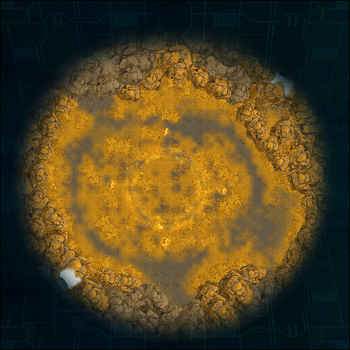
The area where Fanglongmon and the Four Holy Beasts exists.
 Pass [Fanglongmon Dungeon] is required to enter the Dungeon.
- Talk to NPC Guilmon in D-Terminal to receive Quest (Daily) that obtain 2 Pass [Fanglongmon Dungeon].
- Talk to NPC Renamon in D-Terminal by trading 100x
 Yin and Yang Spirit for 1 Pass [Fanglongmon Dungeon].
- Yin and Yang Spirit can be dropped from any Digimon in Versandi Terminal

Info
- Upon entering the dungeon, the room is separated by 4 different zones, which similar to Descending Thunder God Dungeon.
- There will be 4 raids in this room:Xuanwumon Zhuqiaomon Baihumon and Qinglongmon
- The Raids function the same way as the other version in their respective dungeons, however they have more HP and deal more damage.
- The first raid boss to fight is Xuanwumon.
- When Xuanwumon is defeated, there is a choice to go between Zhuqiaomon zone and Baihumon zone.
- Talk to NPC Guilmon to enter the zone to fight Zhuqiaomon.
- Talk to NPC Renamon to enter the zone to fight Baihumon.
- Both Raids must be defeated to unlock the portal to enter the final zone.
- Final boss on this room will be Qinglongmon.
- Defeat Qinglongmon and proceed to the second room.
- Once enter the second room, Player is unable to return to the previous room.
- Party member that disconnect can't enter the second room directly, the raid from the first room will respawn and need to defeat again to enter the second room again. Thus best to avoid disconnection in second room.
Fanglongmon Dungeon
Raids
File:Xuanwumon (Mega) Icon.png Xuanwumon (The Ruler of the North)
 Zhuqiaomon (The Ruler of the South)


Rewards
Obtain the following item when Xuanwumon (The Ruler of the North) is defeated.
 Yin and Yang Box (Xuanwumon)
| 10x |  |
DigiSoul Food HP: B |
| 10x |  |
DigiSoul Food DS: B |
| 10x |  |
DigiSoul Food ALL: B |
| ?x |  |
Grace of Challenge [AT] +50% |
| ?x |  |
Grace of Challenge [HP Max] +50% |
| ?x |  |
Grace of Challenge [DS Max] +50% |
| ?x |  |
Grace of Challenge [DE] +50% |
| ?x |  |
Grace of Challenge [EXP] +1000% |
| ?x |  |
Grace of Challenge [Skill Damage] +100% |
| ?x |  |
Grace of Challenge [Critical Damage] +100% |
| ?x |  |
Grace of Challenge [MS] +35% |
| 1x | File:Chipset G.png | Chipset Box [HP] R10 |
| 1x | File:Chipset G.png | Chipset Box [AT] R10 |
| 1x |  |
Xuanwumon Sealed Shiny Ring |
| 1x |  |
Xuanwumon's Aquatic Ornament (30 Days) |
| 1x |  |
Xuanwumon's Aquatic Cape (30 Days) |
| 1x |  |
Xuanwumon's Aquatic Short Pants (30 Days) |
| 1x |  |
Xuanwumon's Aquatic Hooded Shirt (30 Days) |
| 1x |  |
Xuanwumon's Aquatic Gloves (30 Days) |
| 300x |  |
Xuanwumon Seal |
Obtain the following item when Zhuqiaomon (The Ruler of the South) is defeated.
Yin and Yang Box (Zhuqiaomon)
| 10x | |
DigiSoul Food HP: B |
| 10x | |
DigiSoul Food DS: B |
| 10x | |
DigiSoul Food ALL: B |
| ?x | |
Grace of Challenge [AT] +50% |
| ?x | |
Grace of Challenge [HP Max] +50% |
| ?x | |
Grace of Challenge [DS Max] +50% |
| ?x | |
Grace of Challenge [DE] +50% |
| ?x | |
Grace of Challenge [EXP] +1000% |
| ?x | |
Grace of Challenge [Skill Damage] +100% |
| ?x | |
Grace of Challenge [Critical Damage] +100% |
| ?x | |
Grace of Challenge [MS] +35% |
| 1x | File:Chipset G.png | Chipset Box [DS] R10 |
| 1x | File:Chipset G.png | Chipset Box [HT] R10 |
| 1x |  |
Flame Earring of Sealed Zhuqiaomon |
| 1x |  |
Zhuqiaomon's Infernal Ornament |
| 1x |  |
Zhuqiaomon's Infernal Cape |
| 1x |  |
Zhuqiaomon's Infernal Gloves |
| 1x |  |
Zhuqiaomon's Infernal Hooded Shirt |
| 1x |  |
Zhuqiaomon's Infernal Short Pants |
| 300x | |
Zhuqiaomon Seal |
Obtain the following item when Baihumon (The Ruler of the West) is defeated.
Yin and Yang Box (Baihumon)
| 15x | DigiSoul Food HP: B
|
| 15x | DigiSoul Food DS: B
|
| 15x | DigiSoul Food ALL: B
|
| ?x | Grace of Challenge [AT] +50%
|
| ?x | Grace of Challenge [HP Max] +50%
|
| ?x | Grace of Challenge [DS Max] +50%
|
| ?x | Grace of Challenge [DE] +50%
|
| ?x | Grace of Challenge [EXP] +1000%
|
| ?x | Grace of Challenge [Skill Damage] +100%
|
| ?x | Grace of Challenge [Critical Damage] +100%
|
| ?x | Grace of Challenge [MS] +35%
|
| 1x | File:Chipset G.png Chipset Box [AT] R10 |
| 1x | File:Chipset G.png Chipset Box [EV] R10 |
| 1x | File:Aural Earring of Sealed Baihumon.png Aural Earring of Sealed Baihumon |
| 1x |  Baihumon's Flawless Ornament |
| 1x |  Baihumon's Flawless Cape |
| 1x |  Baihumon's Flawless Hooded Shirt |
| 1x |  Baihumon's Flawless Short Pants |
| 1x |  Baihumon's Flawless Gloves |
| 300x | Baihumon Seal
|
Obtain the following item when Qinglongmon (The Ruler of the East) is defeated.
Yin and Yang Box (Qinglongmon)
| 15x | DigiSoul Food HP: B
|
| 15x | DigiSoul Food DS: B
|
| 15x | DigiSoul Food ALL: B
|
| ?x | Grace of Challenge [AT] +50%
|
| ?x | Grace of Challenge [HP Max] +50%
|
| ?x | Grace of Challenge [DS Max] +50%
|
| ?x | Grace of Challenge [DE] +50%
|
| ?x | Grace of Challenge [EXP] +1000%
|
| ?x | Grace of Challenge [Skill Damage] +100%
|
| ?x | Grace of Challenge [Critical Damage] +100%
|
| ?x | Grace of Challenge [MS] +35%
|
| 1x | File:Chipset G.png Chipset Box [DE] R10 |
| 1x | File:Chipset G.png Chipset Box [CT] R10 |
| 1x |  Qinglongmon's Sealed Radiant Ring |
| 1x |  Qinglongmon's Sealed Radiant Necklace |
| 1x |  Qinglongmon's Sealed Radiant Earring |
| 1x |  Qinglongmon's Lightning Ornament |
| 1x |  Qinglongmon's Lightning Short Pants |
| 1x |  Qinglongmon's Lightning Gloves |
| 1x |  Qinglongmon's Thunder Hood T-shirts |
| 1x |  Qinglongmon's Thunder Cape |
| 300x | Qinglongmon Seal
|
Fanglongmon Dungeon Underground
Raids


Rewards
Obtain the following item when Fanglongmon is defeated.
| 1x |  |
Fanronkou | |
| 1x |  |
Divine Crystal | (not guaranteed drop) |
| 1x | |
Yin and Yang Box (Fanglongmon) |
Yin and Yang Box (Fanglongmon)'
| 100x |  |
Digicore |
| 15x | File:Jump Booster.png | Jump Booster [All Area] |
| 5x |  |
Amazing Renewal Increase Stone |
| 5x |  |
Amazing Digitary Power Stone |
| 20x |  |
Fanglongmon's Life |
| 20x |  |
Fanglongmon's Digisoul |
| 3x |  |
Fanglongmon's Energy |
| 3x |  |
Mercy of the Gold Dragon [AT] +50% |
| 3x |  |
Mercy of the Gold Dragon [Max HP] +50% |
| 3x |  |
Mercy of the Gold Dragon [Max DS] +50% |
| 3x |  |
Mercy of the Gold Dragon [DE] +50% |
| 3x |  |
Mercy of the Gold Dragon [EXP] +1000% |
| 3x |  |
Rage of the Gold Dragon [Skill Damage] +100% |
| 3x |  |
Rage of the Gold Dragon [Critical Damage] +100% |
| 3x |  |
Rage of the Gold Dragon [Movement Speed] +35% |
| 1x |  |
Chipset Box [HP] R11 |
| 1x | |
Chipset Box [DS] R11 |
| 1x | |
Chipset Box [AT] R11 |
| 1x | |
Chipset Box [DE] R11 |
| 1x | |
Chipset Box [HT] R11 |
| 1x | |
Chipset Box [EV] R11 |
| 1x | |
Chipset Box [CT] R11 |
| 1x | File:Fanglongmon's Ring Lv1.png | Fanglongmon's Ancient Ring [Lv.1] |
| 1x | File:Fanglongmon's Necklace Lv1.png | Fanglongmon's Ancient Necklace [Lv.1] |
| 1x | File:Fanglongmon's Earring Lv1.png | Fanglongmon's Ancient Earring [Lv.1] |
| 1x | File:Advanced 102-Blue-BT Random Box.png | Advanced 102-Blue-BT Random Box |
| 1x | |
Fanronkou |


