*Top 1 is [[Rafflesimon]] because it have a Stun Skill and it's extra elemental Attribute/Ranged AA & Skills
*Top 2 is [[Jesmon X]] because of it's Attribute & Ranged Skills
*Top 3 is [[Ordinemon]] because of it's Attribute & Ranged Skills '''(her effects cause a "bug" on the Maps which makes it harder to see)'''
==Informations about Raid==
==Informations about Raid==
Line 38:
Line 47:
*'''HALT!'''
*'''HALT!'''
** All Players receive [[File:ReflectionVajra.png]] Reflection Debuff; Cooldown 60 Seconds
** All Players receive [[File:ReflectionVajra.png]] Last Stand Debuff; Cooldown 60 Seconds
==Vajramon's Battle Phase==
==Vajramon's Battle Phase==
*80% HP, Vajramon will use the Ground Target Circle Skill.
*80% HP, Vajramon will use the Ground Target Circle Skill.
Line 48:
Line 57:
*'''At exactly 30% HP, Vajramon will cast Meteors (x15). You have to stack right after the 14th Meteor (Orange Small Circle) and Split at the Green Circle.'''
*'''At exactly 30% HP, Vajramon will cast Meteors (x15). You have to stack right after the 14th Meteor (Orange Small Circle) and Split at the Green Circle.'''
*28% HP, Vajramon will use the Ground Target Circle & afterwards the 2 Target Circle Skill.
*28% HP, Vajramon will use the Ground Target Circle & afterwards the 2 Target Circle Skill.
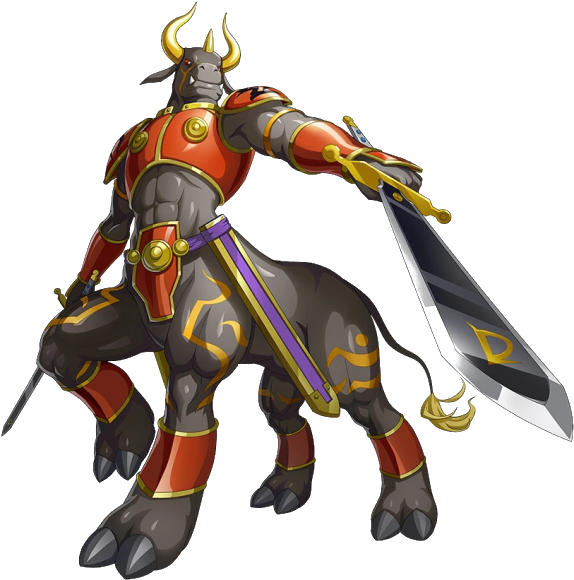
*10~1% HP, Vajramon will use the HALT! Skill and all will receive the '''"Reflection" Debuff'''. You have to wait till Vajramon Summon 2 Mobs, '''<u>kill Kentarumon (Pride) to remove the Debuff.</u>'''
*10~1% HP, Vajramon will use the HALT! Skill and all will receive the '''[[File:ReflectionVajra.png]] [[Last Stand]] Debuff'''. You have to wait till Vajramon Summon 2 Mobs, '''<u>kill Kentarumon (Pride) to remove the Debuff.</u>'''
==Debuff Information==
==Debuff Information==
*[[File:Reflection.png|link=Bleeding Lv.1]] [[Weak Point Lv.1]] - Increased taken Damage by 20%
*[[File:Reflection.png|link=Bleeding Lv.1]] [[Weak Point Lv.1]] - Increased taken Damage by 20%
*[[File:Degeneration_Debuff.png|link=Slow]] [[Mild Stun]] - Movement Speed reduced by 100%, Damage reduced by 80%, Unable to use Skills
*[[File:Degeneration_Debuff.png|link=Slow]] [[Mild Stun]] - Movement Speed reduced by 100%, Damage reduced by 80%, Unable to use Skills
*[[File:ReflectionVajra.png]] [[Reflection]] - Reflect the Damage
*[[File:ReflectionVajra.png]] [[Last Stand]] - Reflect the Damage
*'''Final Stand''' - Return damage dealt to Earth Digimon to 100%
==Drops==
==Drops==
*Obtain the following item when Vajramon (Raid) is defeated.
*Obtain the following item when Vajramon (Raid) is defeated.
Line 65:
Line 72:
===[[File:VajraBox.png|link=Special:FilePath/VajraBox.png]] Treasure of the Beast Box Drops===
===[[File:VajraBox.png|link=Special:FilePath/VajraBox.png]] Treasure of the Beast Box Drops===
|3x|| [[File:Amazing Renewal Increase Stone.png]] Amazing Renewal Increase Stone [Tradeable]
|3x|| [[File:Amazing Renewal Increase Stone.png]] Amazing Renewal Increase Stone [Tradeable]
Line 73:
Line 80:
|2x|| Random 2h Dungeon Buffs [[File:Grace of Challenge AT +50%.png]][[File:Grace of Challenge HP Max +50%.png]][[File:Grace of Challenge DS Max +50%.png]][[File:Grace of Challenge DE +50%.png]][[File:Grace of Challenge EXP +1000%.png]][[File:Grace of Challenge Skill Damage +100%.png]][[File:Grace of Challenge Critical Damage +100%.png]][[File:Grace of Challenge MS +35%.png]]
|2x|| Random 2h Dungeon Buffs [[File:Grace of Challenge AT +50%.png]][[File:Grace of Challenge HP Max +50%.png]][[File:Grace of Challenge DS Max +50%.png]][[File:Grace of Challenge DE +50%.png]][[File:Grace of Challenge EXP +1000%.png]][[File:Grace of Challenge Skill Damage +100%.png]][[File:Grace of Challenge Critical Damage +100%.png]][[File:Grace of Challenge MS +35%.png]]
Top 1 is Rafflesimon because it have a Stun Skill and it's extra elemental Attribute/Ranged AA & Skills
Top 2 is Jesmon X because of it's Attribute & Ranged Skills
Top 3 is Ordinemon because of it's Attribute & Ranged Skills (her effects cause a "bug" on the Maps which makes it harder to see)
Informations about Raid
Vajramon has about ??? HP.
Vajramon is level 120.
You can die only 3 times before you fail Vajramon Dungeon
This raid use 7 different skills:
AOE Circle (Big Orange Circle)
Player inside the Circle will be damaged.
Deals around 7000 damage.
Player inside the Circle receive Weak Point Lv1 Debuff; Cooldown 25 Seconds
2 Target Circle (Small Orange Circles)
Player inside the Circle will be damaged.
Deals around 14000 damage.
Player inside the Circle receive Mild Stun Debuff; Cooldown 5 Seconds
All Target Poison
Player inside the Circle will be damaged.
Deals around 6000 damage .
Small Orange Circle (stack)
Player will be damaged with and without stack.
Deals around 20000 damage. (if stacked)
Deals around 40000 damage. (if not stacked)
Meteors
Player inside the Circle will be damaged.
Deals around 20000 damage.
Player inside the Circle receive Weak Point Lv1 Debuff; Cooldown 25 Seconds
Big Green Circles (split)
Player will be damaged with and without stack.
Deals around 40000 damage. (if stacked)
Deals around 15000 damage. (if not stacked)
HALT!
All Players receive Last Stand Debuff; Cooldown 60 Seconds
Vajramon's Battle Phase
80% HP, Vajramon will use the Ground Target Circle Skill.
65% HP, Vajramon will use the Ground Target Circle Skill.
60% HP, Vajramon will use the 2 Target Circle Skill.
45% HP, Vajramon will use the Ground Target Circle Skill.
42% HP, Vajramon will use an all Target Poison Skill.
35% HP, Vajramon will use the Ground Target Circle & afterwards the 2 Target Circle Skill.
At exactly 30% HP, Vajramon will cast Meteors (x15). You have to stack right after the 14th Meteor (Orange Small Circle) and Split at the Green Circle.
28% HP, Vajramon will use the Ground Target Circle & afterwards the 2 Target Circle Skill.
10~1% HP, Vajramon will use the HALT! Skill and all will receive the Last Stand Debuff. You have to wait till Vajramon Summon 2 Mobs, kill Kentarumon (Pride) to remove the Debuff.

 Weak Point Lv1 Debuff; Cooldown 25 Seconds
 Mild Stun Debuff; Cooldown 5 Seconds
 Last Stand Debuff; Cooldown 60 Seconds
 Essence of Vajramon
 Treasure of the Beast
 Treasure of the Beast Box Drops
 Vajramon Seals
 Amazing Renewal Increase Stone [Tradeable]
 Rechargeable Energy [Tradeable]


 Warriors Ornament [30D]
 Warriors Top [30D]
 Warrior Pants [30D]
 Warrior Gloves [30D]
.png) Warriors Ornament [Shining] [30D]
Warriors Ornament [Shining] [30D]
.png) Warriors Top [Shining] [30D]
Warriors Top [Shining] [30D]
.png) Warrior Pants [Shining] [30D]
Warrior Pants [Shining] [30D]
.png) Warrior Gloves [Shining] [30D]
Warrior Gloves [Shining] [30D]