Digimon Maze F1: Difference between revisions
Jump to navigation
Jump to search
mNo edit summary |
mNo edit summary |
||
| Line 6: | Line 6: | ||
==Wild Digimon== | ==Wild Digimon== | ||
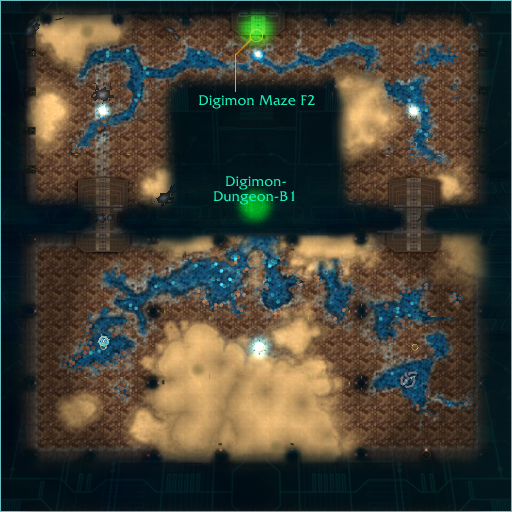
[[File:Imagem 2021-01-31 162358.png|right]] | |||
==Room 1== | ==Room 1== | ||
| Line 40: | Line 41: | ||
|leaderlevels=80-82 | |leaderlevels=80-82 | ||
}} | }} | ||
{{Wild | {{Wild | ||
|name=Keramon | |name=Keramon | ||
Revision as of 20:06, 31 January 2021

A place that is believed to have been created intentionally by someone through data manipulation. The identity of the culprit is shrouded in mystery.
To unlock Digimon Maze F1, you need to complete the "Come on, Boltmons!" quest in Digimon Maze B1.
Wild Digimon

Room 1
| Digimon | HP | Levels | Type | Attribute | Behavior | Drops |
|---|---|---|---|---|---|---|
 |
9 350 | 79-80 | [[File:{{{type}}}.png|{{{type}}}: ]] {{{type}}} |  Virus Virus
|
[[File:{{{behavior}}}.png|{{{behavior}}}| ]] | 0 |
| Digimon | HP | Levels | Type | Attribute | Behavior | Drops |
|---|---|---|---|---|---|---|
 |
8 849 | 79-81 | [[File:{{{type}}}.png|{{{type}}}: ]] {{{type}}} |  Data Data
|
[[File:{{{behavior}}}.png|{{{behavior}}}| ]] | 0 |
| Digimon | HP | Levels | Type | Attribute | Behavior | Drops |
|---|---|---|---|---|---|---|
 |
9 079 | 79-80 | [[File:{{{type}}}.png|{{{type}}}: ]] {{{type}}} | Virus
|
[[File:{{{behavior}}}.png|{{{behavior}}}| ]] | 0 |
| Digimon | HP | Levels | Type | Attribute | Behavior | Drops |
|---|---|---|---|---|---|---|
 |
8 800 | 81-83 |  aggressive aggressive
|
Virus
|
[[File:{{{behavior}}}.png|{{{behavior}}}| ]] | 0 |
| Digimon | HP | Levels | Type | Attribute | Behavior | Drops |
|---|---|---|---|---|---|---|
|
8 800 | 81-83 | aggressive
|
Virus
|
[[File:{{{behavior}}}.png|{{{behavior}}}| ]] | 0 |
Room 2
| Digimon | HP | Levels | Type | Attribute | Behavior | Drops |
|---|---|---|---|---|---|---|
 |
9 400 | 80-82 | [[File:{{{type}}}.png|{{{type}}}: ]] {{{type}}} | Virus
|
[[File:{{{behavior}}}.png|{{{behavior}}}| ]] | 0 |
| Digimon | HP | Levels | Type | Attribute | Behavior | Drops |
|---|---|---|---|---|---|---|
 |
9 091 | 80-82 | [[File:{{{type}}}.png|{{{type}}}: ]] {{{type}}} |  Vaccine Vaccine
|
[[File:{{{behavior}}}.png|{{{behavior}}}| ]] | 0 |
| Digimon | HP | Levels | Type | Attribute | Behavior | Drops |
|---|---|---|---|---|---|---|
 |
9 194 | 79-82 | [[File:{{{type}}}.png|{{{type}}}: ]] {{{type}}} | Data
|
[[File:{{{behavior}}}.png|{{{behavior}}}| ]] | 0 |
| Digimon | HP | Levels | Type | Attribute | Behavior | Drops |
|---|---|---|---|---|---|---|
|
8 800 | 79-81 | aggressive
|
Virus
|
[[File:{{{behavior}}}.png|{{{behavior}}}| ]] | 0 |
Quests
Room 1
- Talk to Leomon | Explore Maze F1
- Talk to Leomon | Talk to other Leomon, Wormmon
- Talk to Leomon | Use device on Wormmon(3), Kill 10 Wormmon, Collect 30 items
- Talk to Leomon | Kill 10 Wormmon (Leader), Collect 30 items
- Talk to Leomon | Leomon corpse letter
- Talk to Leomon | Kill 10 Goblimon (Leader), Collect 20 item, Kill 10 Gotsumon (Leader), Collect 20 items
- Talk to Starmon | Kill 10 Goblimon (Leader), Collect 20 item, Kill 10 Gotsumon (Leader), Collect 20 items
- Talk to Starmon | Collect 1 item from Goblimon
Room 2
- Talk to SuperStarmon | Kill 10 Bakemon , Collect 20 items
- Talk to SuperStarmon | Kill 10 Bearmon , Collect 20 items
- Talk to Starmon | Kill 10 Candlemon, Collect 20 items
- Talk to Starmon | Kill 10 Keramon 101, Collect 1 item
- Talk to Starmon | Kill 10 Keramon 102, Collect 1 item
- Talk to Starmon | Kill 10 Keramon 103, Collect 1 item
- Talk to Starmon | Kill 10 Keramon 104, Collect 1 item
- Talk to Starmon | Summon Guardromon Boss, Kill Guardromon Boss
- Talk to Anubismon | Kill 10 Bearmon (Leader), and 10 Candlemon (Leader)
> Move to Digimon Maze F2