|
|
| Line 1: |
Line 1: |
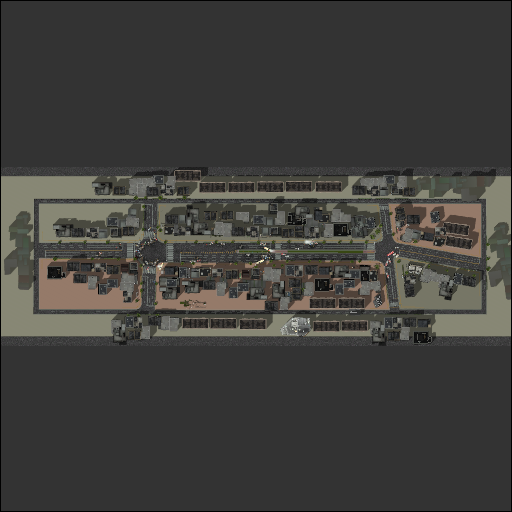
| [[File:VikaRaid.png||right|Vikaralamon]] | | [[Road]] or Vikarlamon Dungeon located on [[Shinjuku Western Area (Day)]]. |
| ==Informations about Raid==
| |
| *Vikaralamon has about ??? HP.
| |
| *Vikaralamon is level 120.
| |
| *Vikaralamon's Skill Damage is increased for the last phase.
| |
| *You can die only 3 times before you fail Vikaralamon Dunegon
| |
| *This raid use 4 different skills:
| |
|
| |
|
| *'''AOE Circle (Big Orange Circle)'''
| | In this dungeon you can challenge Vikaralamon in order to complete main quest in Shinjuku or you can challange Vikaralamon Hard in order to obtain powerful rewards and material for upgrading D-Ark Vice |
| ** Player inside the Circle will be damaged.
| |
| ** Deals around 7500 damage. [Phase 1]
| |
| ** Deals around 14000 damage. [Phase 2]
| |
| ** Player inside the Circle receive [[File:Fatigued.png]] Wave of Darkness Debuff; Cooldown 15 Seconds
| |
|
| |
|
| *'''One-Target Circle (Small Orange Circle)'''
| | See Link below for Vikaralamon Dungeon Hard Tactics |
| ** Player inside the Circle will be damaged.
| |
| ** Deals around 22500 damage. [Phase 1]
| |
| ** Deals around 45000 damage. [Phase 2]
| |
| ** Player inside the Circle receive [[File:Silence.png|link=Silence Debuff]] Contaminated Dust Debuff; Cooldown 15 Seconds
| |
|
| |
|
| *'''Meteors'''
| | [[Vikaralamon Dungeon (Hard)|Vikaralamon Dungeon [Hard]]] |
| ** Player inside the Circle will be damaged.
| |
| ** Deals around 15000 damage. [Phase 1]
| |
| ** Player inside the Circle receive [[File:Reflection.png|link=Bleeding Lv.1]] Armor Piercing Debuff; Cooldown 15 Seconds
| |
|
| |
|
| *'''Beserker Circles (Many Blue Circle)'''
| | <div class="mh"><imagemap> |
| ** Player inside the Circle will be damaged.
| | File:Road.png|right |
| ** Deals around 30000 damage. [Phase 1]
| | desc bottom-right |
| ** Deals around 30000 damage. [Phase 2]
| | </imagemap></div> |
| ** Player inside the Circle receive [[File:Reflection.png|link=Bleeding Lv.1]] Armor Piercing Debuff; Cooldown 15 Seconds
| | ==Raid Boss== |
| | | {{Wild |
| ==Vikaralamon's Battle Phase==
| | |type=aggressive |
| *100%~29% HP, Vikaralamon will alternately use the Ground Target Circle & the Small Target Circle Skill. [Phase 1]
| | |name=Vikarlamon |
| *At around 70% HP, Vikaralamon will use the Ground Circles Skill. [Phase 1]
| | |attr=Vaccine |
| *'''At exactly 29% HP, Vikaralamon will start casting the Meteor (x10) & Beserker Circles (x5) Skill. You have to stack afterwards at a Green Circle (spawn is randomly).'''
| | |element=Pitch Black |
| *29%~10 HP, Vikaralamon will alternately use the Ground Target Circle & the Small Target Circle Skill with higher Damage. [Phase 2]
| | |levels=120 |
| *At around 16% HP, Vikaralamon will use the Serval Circles Skill. [Phase 2]
| | |hp=???? |
| *'''10%~1% HP, All will receive the Protection Field Debuff [[File:Protection Field.png]], 3 small Green Circle will appear back to back and are needed to defeat Vikaralamon.'''
| | }} |
| *'''After standing on Green Circles you will recive [[File:Empowering Zone.png]] Empowering Zone buff. Each level of Empowering Zone gives you higher AT multiplier.'''
| | ==Info== |
| **[[File:Empowering Zone.png]] Empowering Zone Lv.1 Partnermon AT is increased by 10000%
| | [[File:Road_DG.png]] |
| **[[File:Empowering Zone.png]] Empowering Zone Lv.2 Partnermon AT is increased by 30000%
| |
| **[[File:Empowering Zone.png]] Empowering Zone Lv.3 Partnermon AT is increased by 50000%
| |
| | |
| ==Debuff Information== | |
| *[[File:Fatigued.png]] [[Wave of Darkness]] - Dealing 50% less damage
| |
| *[[File:Silence.png|link=Silence Debuff]] [[Contaminated Dust]] - Digimon is unable to cast Skills
| |
| *[[File:Reflection.png|link=Bleeding Lv.1]] [[Armor Piercing]] - Increased taken Damage by 100%
| |
| *[[File:Protection Field.png]] [[Protection Field]] - Partner damage reduced by 99%
| |
| ==Drops== | |
| *Obtain the following item when Vajramon (Raid) is defeated.
| |
| {|
| |
| |5-8x|| [[File:Piece_of_Vikaralamon.png|link=Special:FilePath/Piece_of_Vikaralamon.png]] Essence of Vikaralamon | |
| |-
| |
| ||| [[File:VikaBox.png|link=Special:FilePath/VajraBox.png]] Ancient Pig's Loot | |
| |-
| |
| |}
| |
| ===[[File:VikaBox.png|link=Special:FilePath/VajraBox.png]] Ancient Pig's Loot Drops=== | |
| {|
| |
| |2x|| [[File:Option Change Stone.png]] Option Change Stone [Tradeable]
| |
| |-
| |
| |2x|| [[File:Number Change Stone.png]] Number Change Stone [Tradeable]
| |
| |-
| |
| |3x|| [[File:Backup Disk.png]] Backup Disk [Tradeable]
| |
| |-
| |
| |4x||[[File:Reinforced Digiclone Cube.png]] Reinforced DigiClone Cube [Tradeable]
| |
| |-
| |
| ||| [[File:Chipset Box.png]] Random Chipset Box [R12]
| |
| |-
| |
| ||| [[File:Chipset Box.png]] Random Chipset Box [R13]
| |
| |-
| |
| |}
| |


 aggressive
 Vaccine
