
Royal Base: Difference between revisions
More actions
No edit summary |
El3mentary (talk | contribs) No edit summary |
||
| Line 10: | Line 10: | ||
Upon entering, you will be placed in this room. You will have to fight 3 of the following bosses randomly to progress to the second room. | Upon entering, you will be placed in this room. You will have to fight 3 of the following bosses randomly to progress to the second room. | ||
{{ | {{Mobs | ||
|name=Craniamon | |name=Craniamon | ||
|behavior=Aggressive | |behavior=Aggressive | ||
| | |element=Steel | ||
| | |attr=Vaccine | ||
|levels=99 | |levels=99 | ||
|hp=~9,700,000 | |hp=~9,700,000 | ||
| Line 22: | Line 22: | ||
}} | }} | ||
{{ | {{Mobs | ||
|name=Dynasmon | |name=Dynasmon | ||
|behavior=Aggressive | |behavior=Aggressive | ||
| | |element=Fire | ||
| | |attr=Data | ||
|levels=99 | |levels=99 | ||
|hp=~9,700,000 | |hp=~9,700,000 | ||
| Line 34: | Line 34: | ||
}} | }} | ||
{{ | {{Mobs | ||
|name=Examon | |name=Examon | ||
|behavior=Aggressive | |behavior=Aggressive | ||
| | |element=Light | ||
| | |attr=Vaccine | ||
|levels=99 | |levels=99 | ||
|hp=~9,700,000 | |hp=~9,700,000 | ||
| Line 46: | Line 46: | ||
}} | }} | ||
{{ | {{Mobs | ||
|name=LordKnightmon | |name=LordKnightmon | ||
|behavior=Aggressive | |behavior=Aggressive | ||
| | |element=Steel | ||
| | |attr=Virus | ||
|levels=99 | |levels=99 | ||
|hp=~9,700,000 | |hp=~9,700,000 | ||
| Line 58: | Line 58: | ||
}} | }} | ||
{{ | {{Mobs | ||
|name=Sleipmon | |name=Sleipmon | ||
|behavior=Aggressive | |behavior=Aggressive | ||
| | |element=Light | ||
| | |attr=Vaccine | ||
|levels=99 | |levels=99 | ||
|hp=~9,700,000 | |hp=~9,700,000 | ||
| Line 70: | Line 70: | ||
}} | }} | ||
{{ | {{Mobs | ||
|name=UlforceVeedramon | |name=UlforceVeedramon | ||
|behavior=Aggressive | |behavior=Aggressive | ||
| | |element=Light | ||
| | |attr=Vaccine | ||
|levels=99 | |levels=99 | ||
|hp=~9,700,000 | |hp=~9,700,000 | ||
| Line 82: | Line 82: | ||
}} | }} | ||
===Drop=== | |||
* [[File:X-Antibody - DATA.png]] X-Antibody - DATA | |||
* [[File:Royal Knight's Voucher.png]] Royal Knight's Voucher | |||
* [[File:Seal Icon.png]] Raid bosses' respective seal | |||
*Each time you fight a boss in this room, a random effect will be applied for the entirety of the fight. The effect is corresponding to the color of crystal in the middle of the room. | *Each time you fight a boss in this room, a random effect will be applied for the entirety of the fight. The effect is corresponding to the color of crystal in the middle of the room. | ||
| Line 108: | Line 113: | ||
After DexDorugoramon is defeated, you will be able to enter the last room. | After DexDorugoramon is defeated, you will be able to enter the last room. | ||
{{ | {{Mobs | ||
|name=DexDorugoramon | |name=DexDorugoramon | ||
|behavior=Aggressive | |behavior=Aggressive | ||
| | |element=Pitch Black | ||
| | |attr=Virus | ||
|levels=99 | |levels=99 | ||
|hp=9,700,000 | |hp=9,700,000 | ||
| Line 119: | Line 124: | ||
}} | }} | ||
{{ | {{Mobs | ||
|name=DexDoruGreymon | |name=DexDoruGreymon | ||
|behavior=Aggressive | |behavior=Aggressive | ||
| | |element=Pitch Black | ||
| | |attr=Virus | ||
|levels=99 | |levels=99 | ||
|hp=? | |hp=? | ||
| Line 129: | Line 134: | ||
}} | }} | ||
{{ | {{Mobs | ||
|name=Gate | |name=Gate | ||
|element=None | |||
|attr=None | |attr=None | ||
|levels=99 | |levels=99 | ||
|hp=? | |hp=? | ||
|behavior=Aggressive | |behavior=Aggressive | ||
}} | }} | ||
===Drop=== | |||
* [[File:X-Antibody - DATA.png]] X-Antibody - DATA | |||
* [[File:Seal Icon.png]] DexDorugoramon seal (must pick up from the ground) | |||
==Yggdrasil's Room== | ==Yggdrasil's Room== | ||
| Line 142: | Line 152: | ||
This room is straightforward, as you will have to fight a Dexmon raid boss. Do note that the boss will hit you immediately once you enter the room, so make sure you are ready before coming in. | This room is straightforward, as you will have to fight a Dexmon raid boss. Do note that the boss will hit you immediately once you enter the room, so make sure you are ready before coming in. | ||
{{ | {{Mobs | ||
|name=Dexmon | |name=Dexmon | ||
|behavior=Aggressive | |behavior=Aggressive | ||
| | |element=Pitch Black | ||
| | |attr=Virus | ||
|levels=99 | |levels=99 | ||
|hp=23,500,000 | |hp=23,500,000 | ||
| Line 157: | Line 167: | ||
*Skill 3 = 88,000 damage, target circle, the damage is divided by the number of people it hits | *Skill 3 = 88,000 damage, target circle, the damage is divided by the number of people it hits | ||
== | ===Drop=== | ||
* [[File:Dexmon's Memory.png]] Dexmon's Memory | |||
* [[File:Yggdrasil's Records.png]] Yggdrasil's Records | |||
File: | * [[File:Seal Icon.png]] Dexmon seal | ||
File: | |||
File: | |||
Latest revision as of 17:16, 7 January 2024
This dungeon composes of 3 different rooms. You will not be transported out of the dungeon if you die in this map. You will be affected by X-Program debuff as long as you stay in the map.
Raid
Upon entering, you will be placed in this room. You will have to fight 3 of the following bosses randomly to progress to the second room.
| Craniamon | |||||||||||||||||||
|---|---|---|---|---|---|---|---|---|---|---|---|---|---|---|---|---|---|---|---|
 |
 |
 |
 |
HP: | ~9,700,000 | Level(s): | 99 | ||||||||||||
| Dynasmon | |||||||||||||||||||
|---|---|---|---|---|---|---|---|---|---|---|---|---|---|---|---|---|---|---|---|
 |
|
 |
 |
HP: | ~9,700,000 | Level(s): | 99 | ||||||||||||
| Examon | |||||||||||||||||||
|---|---|---|---|---|---|---|---|---|---|---|---|---|---|---|---|---|---|---|---|
 |
|
|
 |
HP: | ~9,700,000 | Level(s): | 99 | ||||||||||||
| LordKnightmon | |||||||||||||||||||
|---|---|---|---|---|---|---|---|---|---|---|---|---|---|---|---|---|---|---|---|
 |
|
 |
|
HP: | ~9,700,000 | Level(s): | 99 | ||||||||||||
| Sleipmon | |||||||||||||||||||
|---|---|---|---|---|---|---|---|---|---|---|---|---|---|---|---|---|---|---|---|
 |
|
|
|
HP: | ~9,700,000 | Level(s): | 99 | ||||||||||||
| UlforceVeedramon | |||||||||||||||||||
|---|---|---|---|---|---|---|---|---|---|---|---|---|---|---|---|---|---|---|---|
 |
|
|
|
HP: | ~9,700,000 | Level(s): | 99 | ||||||||||||
Drop
 X-Antibody - DATA
 Royal Knight's Voucher
 Raid bosses' respective seal


- Each time you fight a boss in this room, a random effect will be applied for the entirety of the fight. The effect is corresponding to the color of crystal in the middle of the room.
| Color of Crystal | Effect |
|---|---|
| Grey | Your movement speed is reduced by 10% |
| Red | Your normal attack damage is reduced by 10% |
| Orange | Your skill damage is reduced by 10% |
| Green | The damage you receive is reduced by 10% |
| Purple | The damage you receive is increased by 10% |
| Pink | You receive 100 damage every 10 seconds |
Center Royal Base
This room is further divided into 3 different zones. Upon entering, the party will have to defeat 2 Gate enemies. Many DexDoruGreymon will be summoned during the fight. Once the Gate are defeated, 2 portals will become available and the party can decide which zone they would like to go. One portal leads to DexDorugoramon raid boss, while the other leads to an egg room.
At this point, your goal is to defeat the DexDorugoramon raid boss. However, the egg will be starting to hatch into DexDoruGreymon once you attack the raid. The more DexDoruGreymon there is, the stronger the raid boss becomes. Upon fighting the boss, you will also be getting a debuff which reduces your attack damage and increases the damage you take by 50%. This debuff will be cured for 15 seconds after someone kills an egg in the other room. Do note that both the eggs and the debuff will be constantly respawning until the raid is defeating.
After DexDorugoramon is defeated, you will be able to enter the last room.
| DexDorugoramon | |||||||||||||||||||
|---|---|---|---|---|---|---|---|---|---|---|---|---|---|---|---|---|---|---|---|
 |
|
|
 |
HP: | 9,700,000 | Level(s): | 99 | ||||||||||||
| DexDoruGreymon | |||||||||||||||||||
|---|---|---|---|---|---|---|---|---|---|---|---|---|---|---|---|---|---|---|---|
 |
|
|
|
HP: | ? | Level(s): | 99 | ||||||||||||
| Gate | |||||||||||||||||||
|---|---|---|---|---|---|---|---|---|---|---|---|---|---|---|---|---|---|---|---|
| File:Gate Icon.png | |
 |
|
HP: | ? | Level(s): | 99 | ||||||||||||
Drop
- X-Antibody - DATA
- DexDorugoramon seal (must pick up from the ground)
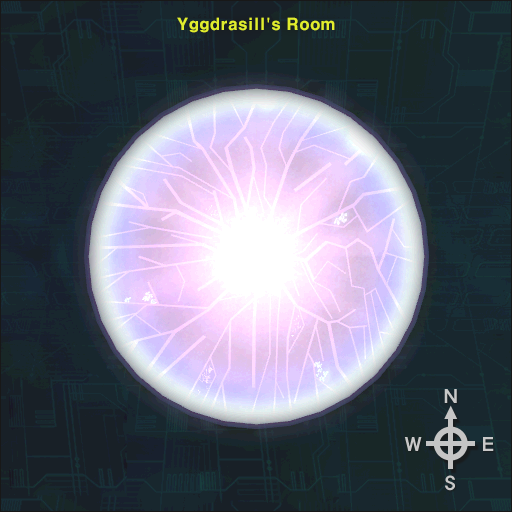
Yggdrasil's Room
This room is straightforward, as you will have to fight a Dexmon raid boss. Do note that the boss will hit you immediately once you enter the room, so make sure you are ready before coming in.
| Dexmon | |||||||||||||||||||
|---|---|---|---|---|---|---|---|---|---|---|---|---|---|---|---|---|---|---|---|
 |
|
|
|
HP: | 23,500,000 | Level(s): | 99 | ||||||||||||
- Skill 1 = 13,200 damage, cannot be dodged
- Skill 2 = 26,400 damage, can be dodged
- Skill 3 = 88,000 damage, target circle, the damage is divided by the number of people it hits
Drop
 Dexmon's Memory
 Yggdrasil's Records
- Dexmon seal


